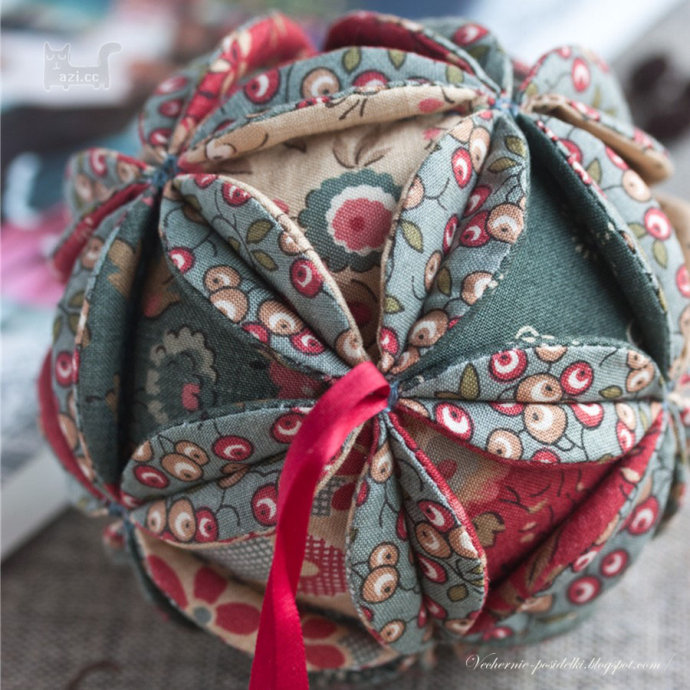
Make your own Christmas tree ornaments can be fun and easy with this Russian style Vintage Ball Ornament DIY Tutorial, it’s versatile too, not only be used to hang on Tree or elsewhere, but use it as wedding decoration (this is one of the traditional kissing ball design in Asia wedding ceremony) or kids playing ball, add a Vintage, romantic, and soft feeling for Christmas decoration. I have shared some Fabric Christmas Ornament Tutorials that you can check them out. This Quilted Christmas Ornaments is another easy quilting project to use up scraps of fabric!
You may love: No-Sew Quilted Christmas Ornaments DIY Tutorial

Materials Needed:
- different cotton fabrics for the top
- cotton fabric for the lining
- cotton batting or felt
- fluffy filling
- silk ribbon
Tutorial:
1. Cut round detail from cotton batting and iron it to the back side of fabric for the top. Diameter of following round detail is 5cm.
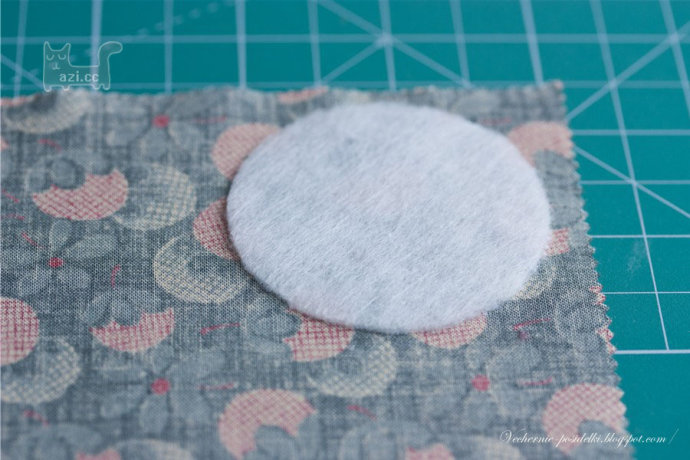
2. Cut round detail from Vlieseline H630 and iron it to the wrong side of fabric for the top. Diameter of my round detail is 5cm.

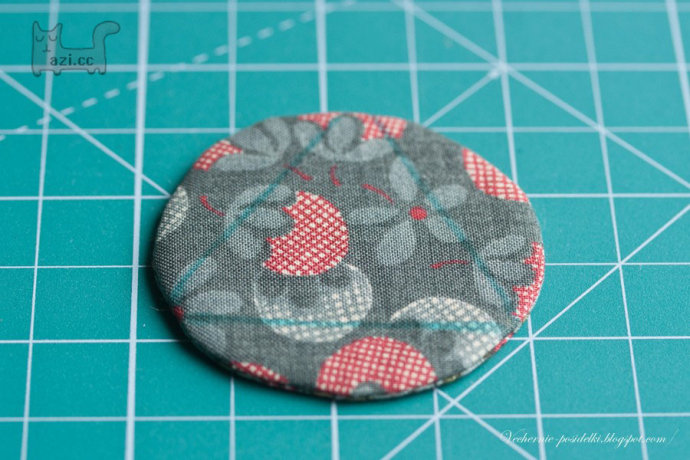
3. Cut the small hole on the lining. Turn the detail out.

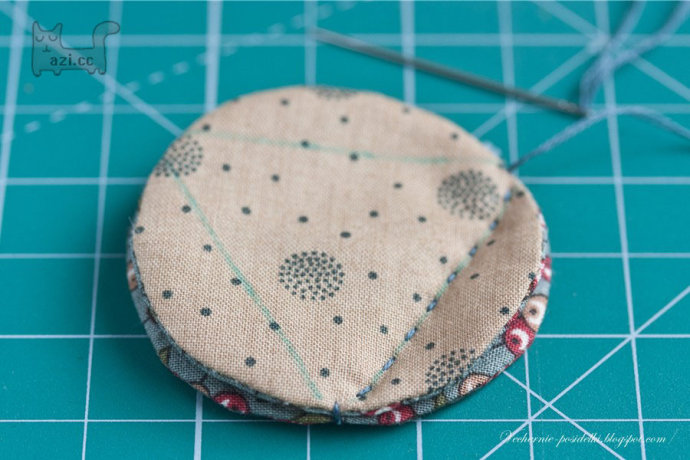
4. Press the detail. Draw the equilateral triangle on the right side of it.
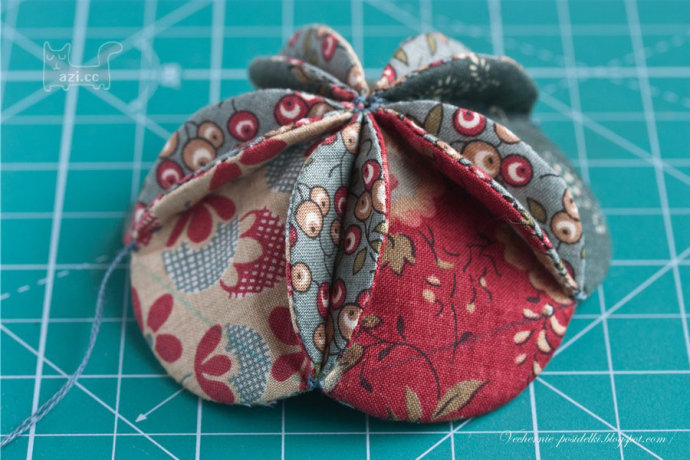
5. Make the same for 19 more details (total number of details is 20). Put two details wrong sides together and make hand stitches just on the drawn line.
6. Continue to sew the details together till all the round detail are over. Follow the photo of the ready ball.

7. Put the fluffy filling into the ball before finishing. Add the ribbon.